Do you have a home or lab server, maybe a Virtual Private Server (VPS) that you just haven’t decided what to do with?
Have you ever wanted to host your own websites and e-mail, but weren’t sure where to start?
Over the years, I have paid shared hosting companies to host my websites and e-mail. One of the things I appreciated as an end-user, and occasionally as a reseller, was the ability to manage all aspects of my hosting (like DNS, mail, and server config) through a Hosting Control Panel such as CPanel, Plesk, or some provider’s home-grown solution.
If you’re self-hosting and want similar capabilities without the licensing fees, take a look at CyberPanel - it’s a free Hosting Management Panel that you install on your own server. CyberPanel makes it easy to setup the proper DNS records (MX/SPF/DKIM) to help reduce the possibility of your outbound mail landing in your recipients spam. It also provides free SSL Certificates via LetsEncrypt. Those certificates secure your website, CyberPanel admin page, and your e-mail server with SSL/TLS and STARTTLS. You could even configure multiple users and websites so that each family (or team) member could manage their own domain resources on your server, without giving them full access to your VPS!
In this 4 part series of articles, I’ll be stepping through a number of steps and topics to get a basic setup of CyberPanel with OpenLiteSpeed installed on a RackNerd VPS with Lets Encrypt securing the websites and e-mail server.
Here’s a full breakdown of the topics that will be covered in the articles and accompanying videos:
CyberPanel 4 Part Series Topics
Part 1:
- Introduction - Watch on YouTube
- RackNerd Deal of the Day - VPS - Watch on YouTube
- Review my VPS Specs
- RackNerd VPS OS Reinstall - Watch on YouTube
- Brief CyberPanel Overview - Watch on YouTube
- Lets Encrypt SSL Certificate automated renewal - Watch on YouTube
- Registrar DNS (Google) config and Glue Records - Watch on YouTube
Part 2:
- Introduction - Watch on YouTube
- SSH Access to VPS - Watch on YouTube
- Create a non-root user - Watch on YouTube
- Grant user sudo access - Watch on YouTube
- Add SSH Pub key for passwordless SSH access - Watch on YouTube
- Confirm SSH and sudo access of non-root user - Watch on YouTube
- Configure SSH Server to not permit root or password based logins - Watch on YouTube
- Confirm root cannot login - Watch on YouTube
- Update apt repo and upgrade packages on OS - Watch on YouTube
- Confirm “sed” is accessible as /usr/bin/sed - Watch on YouTube
- Install CyberPanel - Watch on YouTube
- Fail2Ban
- Reboot and Login to the CyberPanel UI - Watch on YouTube
- Video Walk-through
Part 3:
- Introduction - Watch on YouTube
- Update CyberPanel admin account - Watch on YouTube
- Create a root website for web and e-mail - Watch on YouTube
- Configure NameServers in CyberPanel - Watch on YouTube
- Review DNS Records - Watch on YouTube
- Run DNS check - Watch on YouTube
- Enable SSL on the mail server - Watch on YouTube
- Create an e-mail account - Watch on YouTube
- Get e-mail server details for 3rd party mail clients - Watch on YouTube
- Test mail using Rainloop webmail - Watch on YouTube
- Run mail-tester.com test on mail server - Watch on YouTube
- Configure and test Thunderbird with SSL/TLS enabled protocols - Watch on YouTube
- Video Walk-through
Part 4:
- Introduction
- Create a website for CyberPanel Admin UI
- Confirm SSL enabled by Lets Encrypt
- Add SSL Cert to port 8090
- Remove the need to use port 8090
- Use CyberPanel firewall config to block port 7080
- CyberPanel Dark Mode
- Wordpress Install
- Re-try Joomla Install
- Video Walk-through
Getting Started
In order to follow along with this tutorial, you’ll need a few resources available to you. In particular:
- VPS server from RackNerd - you could substitute this with your own VPS, Dedicated Server, local Virtual machine, etc… Just keep in mind that the tutorial and video assumes DNS Resolution and port 80 accessibility from the internet to your server for Lets Encrypt SSL Certificates
- Registrar DNS Management - In the tutorial, I’m using Google Domains
- Comfort with Linux and working at a command line
RackNerd Deals - VPS
![]() For the last couple years, I’ve kept an eye on LowEndBox to research reputable VPS providers at a home-labber’s budget. During the Black-Friday/Cyber Monday sale period, there are lots of deals to be had from a variety of vendors.
For the last couple years, I’ve kept an eye on LowEndBox to research reputable VPS providers at a home-labber’s budget. During the Black-Friday/Cyber Monday sale period, there are lots of deals to be had from a variety of vendors.
One that I’ve seen regularly getting high praise, and participating heavily in comments, discussions, and promotions is RackNerd. Be sure to be on the lookout for a pink banner across the top of their homepage for a “Deal of the Day”, “New Deals”, or other promos as they are always priced far better than their standard VPS offerings. For the time that I’ve been a customer, I’ve only submitted 2 tickets and they were both responded to within an hour - even on holidays so I’m quite happy with their service so far and highly recommend them to any other folks looking for an affordable VPS with full root access, a choice of operating Linux operating systems, and a static IP.
Review my VPS specs
I was able to land a deal (just under $30 USD) during Black Friday/Cyber Monday that gave me a VPS with the following specs:
- 2 CPUs
- 2.5 GB RAM
- 50 GB SSD
- 5.9TB Monthly Transfer
- 1 Static IP address
RackNerd VPS OS Reinstall
Reinstallation of the OS on a RackNerd VPS is a pretty simple process.
- Login to your VPS Control Panel
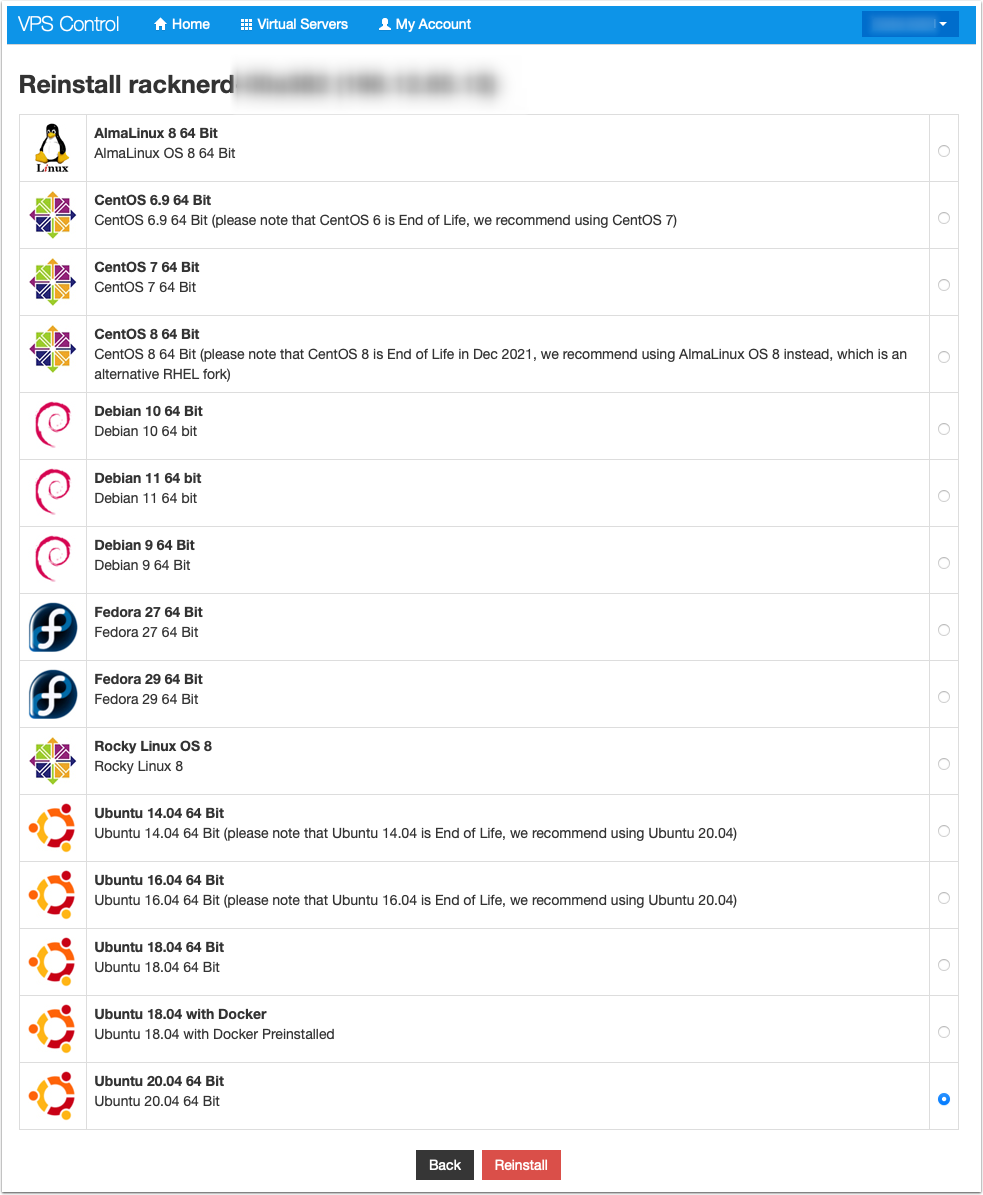
- Click the “Reinstall” button
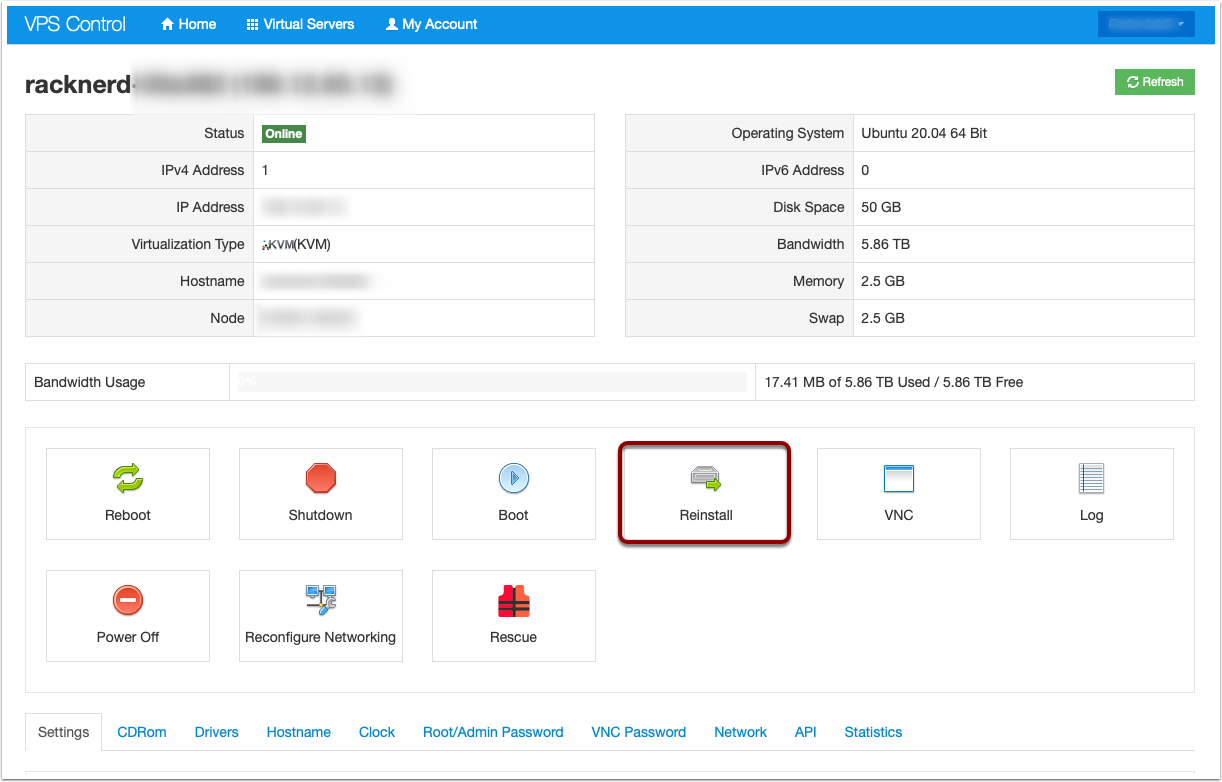
- Choose which OS you wish to Reinstall
- Confirm that you really wish to Reinstall
- Copy/Save the root PW presented on the screen to 1Password (or whatever password manager you prefer ) and wait 5-10 min
- Login and secure your server
Brief CyberPanel Overview

CyberPanel is a web hosting control panel. It operates in the same arena as commercial products such as CPanel and Plesk as noted at the beginning of this article. The beautiful thing about it though; you can install and use it for free on your own server! It gives you the ability to setup and manage multiple websites, and all of there peripheral services (e-mail addresses, databases, DNS records, SSL, Child Domains, Users, FTP, etc…)
During this series, I’ll be setting it up with OpenLiteSpeed - an open source edition of the LiteSpeed web server. This web server is fast, includes LSCache to speed up websites, and can run PHP based sites.
Lets Encrypt SSL Certificate automated renewal
SSL Integration in CyberPanel is with Lets Encrypt, allowing you to have FREE, automatically renewed SSL certificates for each of your websites, managment site, and e-mail services. (I’ll cover SSL for websites and e-mail in Part 3 of this series!). During installation, a cron job is created to run daily at 7 a.m. server time to process the SSL checks, renewing if/when needed - before the certificate expires.
Registrar DNS (Google) config and Glue Records
When you are setting up a brand new server to act as the DNS server for a domain that the server itself is hosting, you need to make some adjustments at the Registrar level. The Registrar is where you have registered the domain you are working with. In my case, it is Google Domains.
Within your Registrar’s management page for your domain, You’ll need to specify a minimum of 2 Custom Name Servers for your domain. But wait… if I specify ns1.example.com and ns2.example.com as the name servers, how does google know how to resolve those to an IP Address if the server is yet to be setup? Glue Records!
Here’s a quote from Google Domains Help - Glue Records
In your google Domain Management page, under DNS, click on Global DNS Settings
Here, you can add your Glue Records. Since we’re dealing with a single VPS that will be running the DNS and managing the domain, simply create two records that point to the public IP of your server.
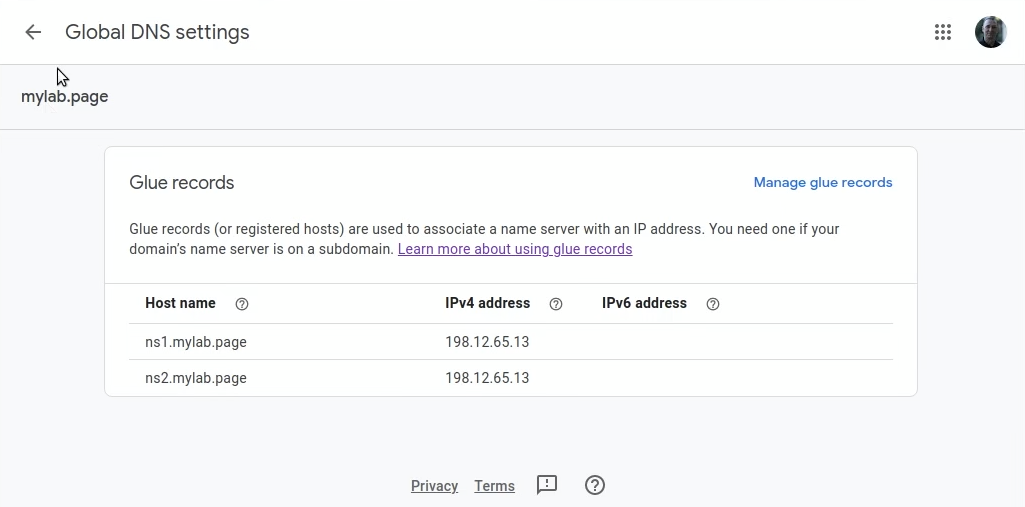
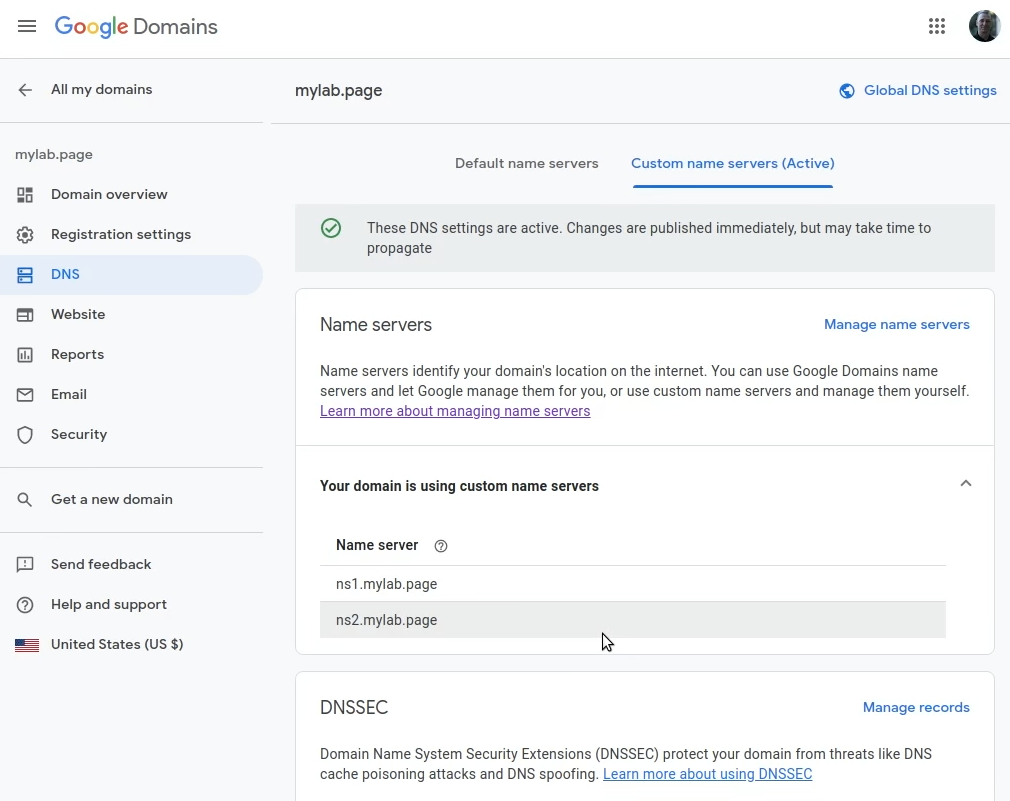
Once those two Glue Records are in place, you can proceed with actually specifying the two Name Servers on the Custom Name Servers page:
Video Walk-through
Any comments? Please post them on the YouTube Video - thanks!
