Are you not happy with specifying port 8090/rainloop on your CyberPanel admin page (1) for your users’ webmail access? Have you followed my tutorial on getting rid of port 8090, but would still don’t like (2) rainloop being the name of your webmail access for your users/customers? How would you like to direct access to RainLoop webmail to something like (3) webmail.example.com or (4) customer.another-example.com/webmail?

The most common response to this feature was always pointing to using the default url or installing your own copy of Rainloop in another folder/website and using that. This article teaches you how to change the access address for the Rainloop webmail that is built-in to CyberPanel!
Pre-requisite
In order to complete the steps below, it is assumed you have completed some basic configuration of your CyberPanel 2.1.+ installation. This includes having a dedicated Fully Qualified Domain Name (FQDN) for your CyberPanel admin page and disabling port 8090 as per https://dimensionquest.net/2022/01/cyberpanel-3 , and more importantly https://dimensionquest.net/2022/01/cyberpanel-4.
Essentially, you should currently be able to access your webmail at: https://yourdomain.lab/rainloop
Everything on this page points to, and uses the default, built-in rainloop installation that is provided as part of CyberPanel.
Dedicated Website - FQDN
If you are hosting a single Domain in CyberPanel and your users can all easily remember a webmail address for the domain, then setting up a dedicated website FQDN for webmail access may be the ideal choice for you. You could even do this for each domain you have setup (IE: webmail.example1.com, webmail.example2.com).
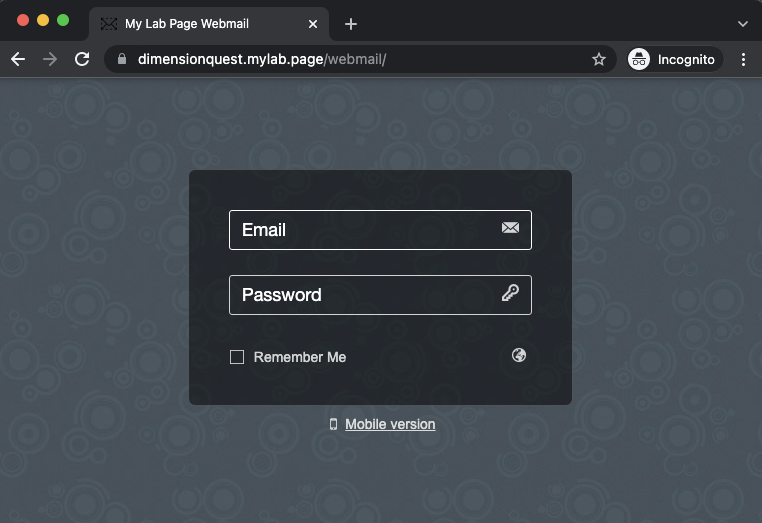
Here’s how you do it in your CyberPanel admin page: {{alert “The only change to the instructions/code provided here, is you should replace webmail.mylab.page with the FQDN of the website you have created!” }}
- Create a new website, for example: webmail.mylab.page (Be sure to include SSL !)
- Add the following to the Rewrite Rules in that website:
1RewriteEngine on
2RewriteCond %{HTTP_HOST} ^webmail.mylab.page$
3RewriteRule ^(.*)$ HTTP://cyberpanel/rainloop/$1 [P]
- Now go to your new website URL: webmail.mylab.page - you should be presented with an SSL enabled website like this:
Custom Webmail Subdirectory
Ok, the FQDN method looks pretty easy.. how about if I want each of my websites to simply have a /webmail (or /mail) subdirectory that loads the rainloop UI, can I do that??
Sure, Here’s the easiest method that I could get to work:
- Go to the Filemanager for your desired website and enter the public_html folder
- Create a subdirectory named “webmail” (or whatever you prefer)
- Create a file named .htaccess in that directory
- Place the following contents in that .htaccess file:
1RewriteEngine On
2RewriteRule ^(.*)$ HTTP://cyberpanel/rainloop/$1 [P]
You should now be able to go to the /webmail url of your domain and see the rainloop login page!
For those of us who don’t deal with RewriteRules, the tasks in this article can be quite challenging to figure out on our own. I hope that you found this article helpful and that it saved you some time and/or improved you and/or your users’ experience accessing Rainloop Webmail via your CyberPanel installation.
Video Walk-through (available Feb 2, 2022)
This wraps up today’s article. Please do watch the YouTube Video. Please Like, Subscribe, and hit that bell icon for notifications of new videos. Any questions/comments should be posted to the YouTube video comments page. - thanks!


